Most garages aren’t fully insulated, and even attached garages only have insulation on the wall shared with the house. However, insulating a garage has several benefits, especially when it comes to saving on energy costs.
If your garage has a heating or cooling system, insulation is necessary to maximize energy efficiency. But even if you don’t have temperature control, insulation can also reduce the impact of extreme temperatures in the summer and winter months.
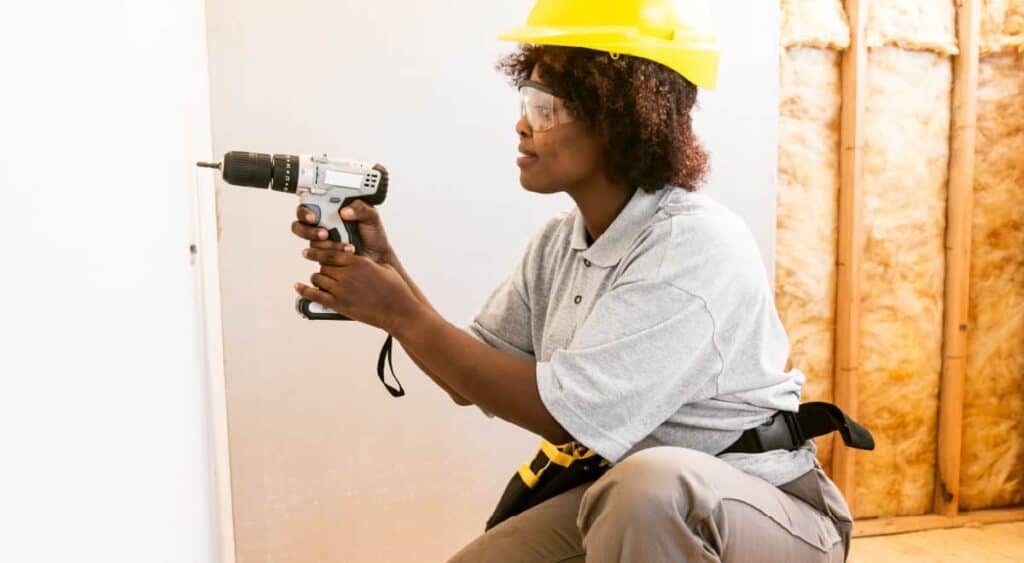
Installing insulation is a pretty achievable DIY project, depending on your space and insulation choice. Read on to learn how to insulate a garage, how much it costs, how to compare different insulation types, and the steps to install insulation like a pro.
Why It’s Important to Insulate Your Garage
Insulation helps prevent heat and moisture transfer so that you can spend more time in your garage, regardless of the weather. Consider insulating your garage for these benefits:
- Comfort: Insulation provides temperature and moisture control, especially during hot summers and in colder climates.
- Energy reduction: Insulation provides energy savings by preventing energy loss through the walls, ceiling, and garage doors.
- Noise reduction: Insulation offers soundproofing benefits.

How to Choose from Different Garage Insulation Types
Different insulation types have different efficiencies and specialized benefits, so consider how your garage is built and your goals before choosing insulation.
For example, some types of insulation are best for interior living, like spray foam for a converted garage office. Others, like double bubble insulation, are ideal for controlling moisture in a metal garage.

All insulations feature an “R-value” that gauges how well a material insulates. R-values go as high as R-60, but exterior wall insulations are best between R-13 and R-20.
Here’s an introduction to popular garage insulation options:
- Fiberglass batts: A common type of insulation that fits between joists and studs and is a relatively affordable option.
- Woven: A mix of foil, bubble, and woven materials for controlling temperatures in a metal building. Often used in conjunction with radiant barriers for optimal energy efficiency in metal garages.
- Cellulose: A loose-fill insulation made from recycled newspapers and other materials. Cellulose insulation is an eco-friendly option you can use to fill wall cavities.
- Rigid foam: Foam panels or sheets with a high R-value. Rigid foam insulation can be used for exterior walls, the underside of roofs, and even garage door panels.
- Spray foam: An energy-efficient chemical insulation for interior living spaces and converted garage spaces. It comes in two types: open-cell spray foam, which is more affordable, and closed-cell spray foam, which is more expensive but offers superior moisture resistance.
- Double bubble: Also known as reflective insulation and made of sheets of bubble wrap with a foil backing to prevent condensation on metal garage walls.
Insulation isn’t one-size-fits-all, so you’ll need to compare the pros and cons of each type to choose what’s best for your garage. Consider how your garage is built, how you’ll install the insulation, and what benefits you need for your space.
| Insulation Type | Best For | Pros | Cons |
|---|---|---|---|
| Fiberglass Batts | Stick-built garages | Affordable, easy to install, readily available | Can cause irritation, prone to moisture damage, mold, and mildew |
| Cellulose | Stick-built garages | Eco-friendly, fire-resistant, good for filling cavities | Can be expensive for finished walls and may settle over time |
| Rigid Foam | Unfinished walls, doors | Affordable, good for noise reduction, can be cut to fit irregular spaces | Susceptible to moisture, must be tightly installed, may not meet building codes for air venting |
| Spray Foam | Interior living spaces | Flexible for tight spaces, good air-sealing properties | Closed-cell foam is more expensive and not ideal for metal garages due to its potential to trap moisture |
| Double Bubble | Metal garage walls | Moisture control, inexpensive | Not suited for temperature control on its own |
How Much Does It Cost to Insulate a Garage?
Garage insulation costs range between $0.50 and $3 per square foot of wall and ceiling (Home Guide). The total project cost can range from several hundred dollars for DIY installation to several thousand dollars for professional installation.
Costs vary by material type and garage size. Material type impacts both the material cost and labor cost. Some common insulation materials, like foam spray, are harder to install and require more time and experience.
Here’s an overview of costs per square foot by material choice:
- Fiberglass Batt: $0.30-$1.50/sq.ft.
- Double-bubble: $0.40-$0.65/sq.ft.
- Foam Board: $0.60-$2.00/sq.ft.
- Woven 17: $0.70-$0.90/sq.ft.
- Spray Foam: $1.65-$3.80/sq.ft.
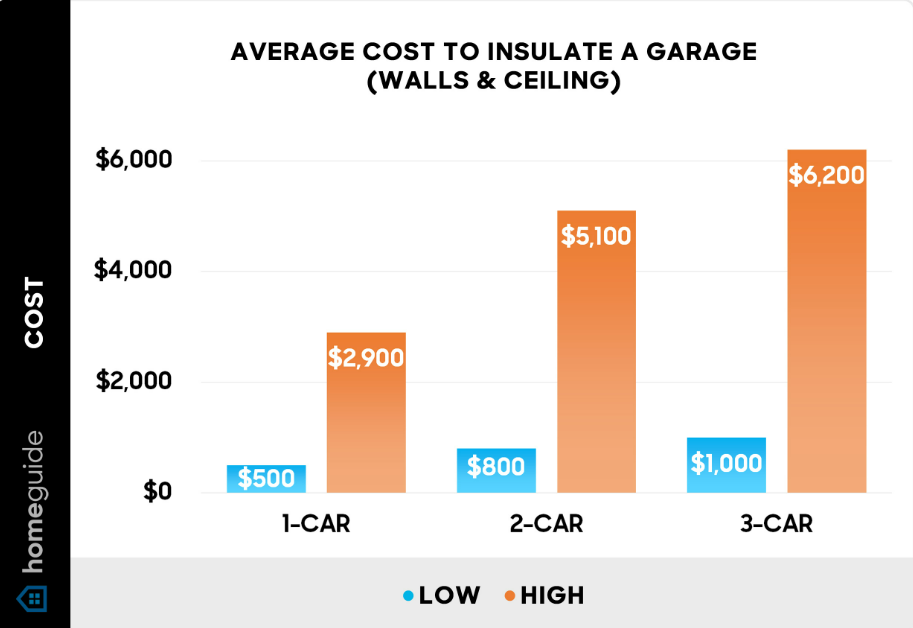
To give you a better idea, let’s look at some examples of costs for insulating a 1-car and a 2-car garage using two different insulation products: fiberglass for a wood frame garage and double bubble for a metal garage.
| Type of Garage | Garage Size (Ft) | Wall Height (Ft) | Insulation Type | Insulation Cost |
|---|---|---|---|---|
| 1-Car Wooden Structure | 12’ x 25’ | 10’ | Fiberglass | $1,290.00 |
| 1-Car Metal Garage | 12’ x 25’ | 10’ | Double Bubble | $1,540.00 |
| 2-Car Wooden Structure | 24’ x 25’ | 10’ | Fiberglass | $1,910.00 |
| 2-Car Metal Garage | 24’ x 25’ | 10’ | Double Bubble | $2,270.00 |
Keep in mind that these are just estimates for DIY installation. If you hire an installer, you can expect to add close to $2,000 to insulate the 1-car garage and $3,000 for the 2-car garage.
How to Insulate a Garage: Planning and General Steps
Now, let’s get down to the nitty-gritty of how to insulate a garage. While different types of insulation have their own quirks, there are some basic steps that apply to most projects.
The Tools You’ll Need
Regardless of the type of insulation you choose, you’ll need some basic tools to get the job done. Here’s a list to get you started:
- Utility knife: To cut batt insulation and other materials.
- Tape measure: To measure garage walls, ceiling, and door for accurate insulation sizing.
- Safety glasses: To protect your eyes from debris.
- Gloves: To protect your hands from sharp debris and irritation.
- An N95 mask: To protect your lungs from insulation fibers.
- Hammer: For general use.
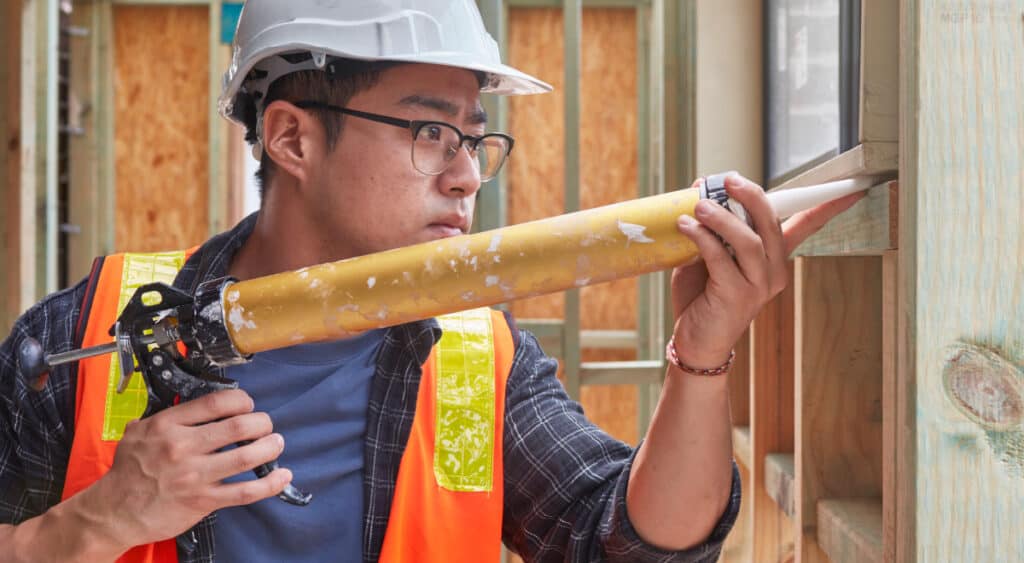
- Caulking gun: To seal gaps and cracks.
- Screwdriver: To install drywall screws or other fasteners.
- A ladder: To reach high areas in your garage.
In addition to these general tools, you might need some specific tools depending on the type of insulation you choose. Here’s a table to help you out:
| Insulation Type | Specific Tools |
|---|---|
| Fiberglass Batts | Staple gun, utility knife |
| Double Bubble | Scissors, staple gun, or insulation adhesive |
| Rigid Foam | Utility knife or saw, insulation adhesive or mechanical fasteners |
| Loose-Fill | Insulation blower |
Materials
Here’s a list of the materials you’ll typically need for your garage insulation project:
- Insulation (fiberglass batts, rigid foam boards, spray foam, etc.)
- Vapor barrier (if needed)
- Drywall screws (if finishing with drywall)
- Caulk
- Fasteners (for rigid foam boards)
- Sealant (for sealing gaps and seams)
Where to Place Vapor Barriers
Vapor barriers are important for preventing moisture from getting trapped inside your walls. But where you place them depends on your climate.
- Cold Climates: If you live in a colder, drier climate, like the northern US, you’ll typically install the vapor barrier on the inside of the wall, between the insulation and the drywall. This helps prevent warm, moist air inside your home from condensing on the cold exterior walls.
- Warm, Humid Climates: If you live in a warmer, more humid climate, like Florida, you’ll want to install the vapor barrier on the outside of the wall, between the insulation and the exterior sheathing. This helps prevent humid air from outside from condensing on the cool interior walls.
If you’re unsure where to place your vapor barrier, consult with a professional or check local building codes. The wrong placement can lead to rot, mildew, and corrosion.
Step 1. Planning: Decide What Parts of Your Garage to Insulate
When insulating your garage, you’ll want to focus on the areas where heat is most likely to escape. Consider the following:
- Roof: The roof is the biggest culprit for heat loss, so insulating your garage ceiling is crucial.
- Walls: A lot of heat is also lost through walls, so insulating them is critical.
- Garage Doors: Insulated garage doors can make a big difference in your garage’s overall energy efficiency.
Garage floors are rarely insulated, especially with a concrete slab foundation. However, if you plan to convert the garage into an office or living space and want a comfortable temperature, consider insulating it.
Step 2. Prepare Your Garage for Insulation
Before you start insulating, you’ll need to prepare your garage. This means clearing out any clutter or items you have stored in there. You’ll also need to decide whether you’re working with a new construction or an existing garage.
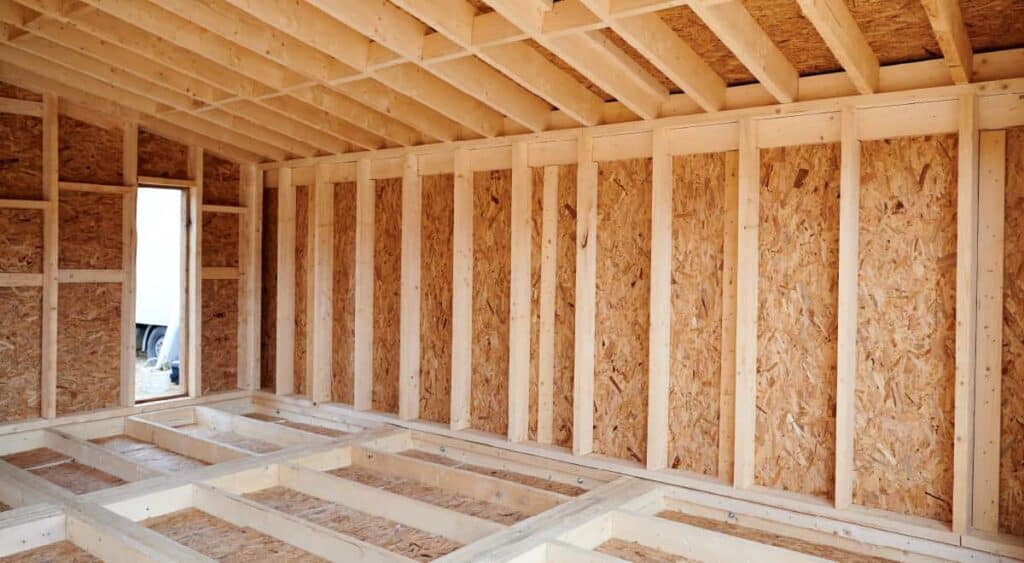
- New Construction: If you’re insulating a new garage, you’ll have the advantage of working with exposed framing, which makes installation much easier.
- Existing Garage: To insulate an existing garage, you’ll need to remove any drywall or other wall coverings to access the framing.
Fiberglass batts and foam insulation are installed between joists and studs, and rigid foam boards are installed on the exterior of the framing. Either way, you’ll need to clear everything off the walls before you begin.
Step 3. Take Safety Precautions
Safety first!
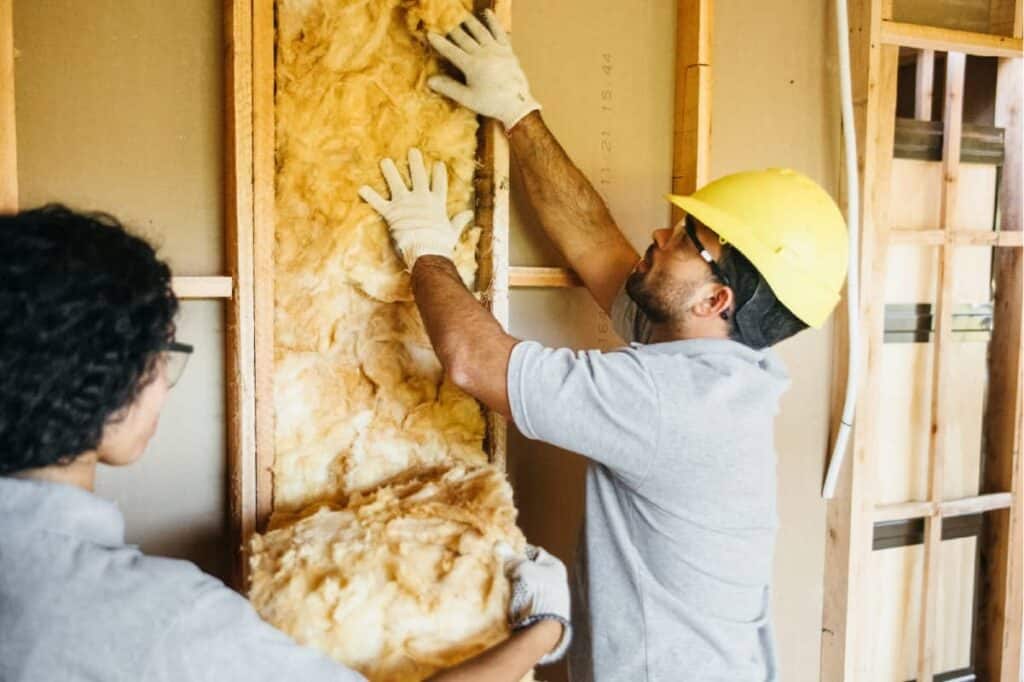
Protective eyewear, gloves, and masks are essential for safe fiberglass insulation installation. Fiberglass is made of tiny glass particles that harm the skin, eyes, and lungs. Safety equipment prevents irritation and long-term respiratory concerns.
If you’re working with spray foam insulation, you’ll need to wear more effective protective gear and ensure good ventilation in your garage.
Step 4. Sizing and Preparing Insulation for Installation
We’ve all heard it, but it bears repeating: Measure twice, cut once!
Before you install your insulation, you’ll need to make sure it’s the correct size. This will help ensure a snug fit, which maximizes the insulation’s effectiveness and prevents gaps that can reduce energy efficiency.
Here’s how to prepare different types of insulation:
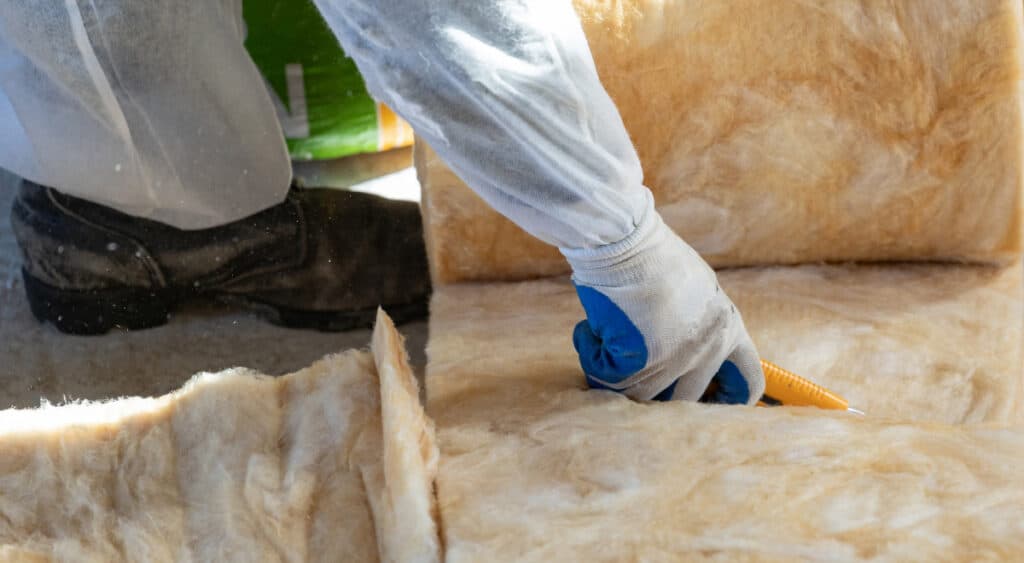
- Batts: You have two options to trim your batting—measure your stud spaces and cut the insulation to fit or trim the excess once the batt is in place.
Cutting placed insulation is more efficient, but you can always pre-measure batts if that doesn’t work. In either case, leave a little extra insulation to prevent any gaps. Don’t leave too much excess, which can cause the insulation to bulge and bunch. Consider giving an extra half-inch to the length and width.
- Rigid Foam Boards: Measure the area you need to cover and cut the boards to size. You can use a utility knife or saw for this. Remember to account for any obstructions, like electrical outlets or pipes.
- Loose-Fill: Loose-fill insulation doesn’t require cutting, but you’ll need to calculate the volume of the space you’re filling to ensure you have enough material.
How to Insulate Garage Walls
Insulated walls are the cornerstone of a comfortable and energy-efficient space. Here’s a step-by-step guide to help you get the job done:
Step 1. Clear the Walls
As we mentioned earlier, you’ll need to clear your garage walls of drywall debris or obstructions before you can start insulating. Doing so will give you a clean slate to work with and ensure that your insulation is installed correctly.
Step 2. Inspect and Seal the Walls
Before you install insulation, inspect your walls for cracks, gaps, or damage. These can be common around window and door frames.
Repair any issues with exterior sealant to prevent moisture and insects from entering your walls. Doing so maintains energy efficiency and prevents additional rust.
While you’re at it, inspect your wall framing for any damage or loose fasteners and repair them as necessary.
Step 3. Install Insulation and Vapor Barriers
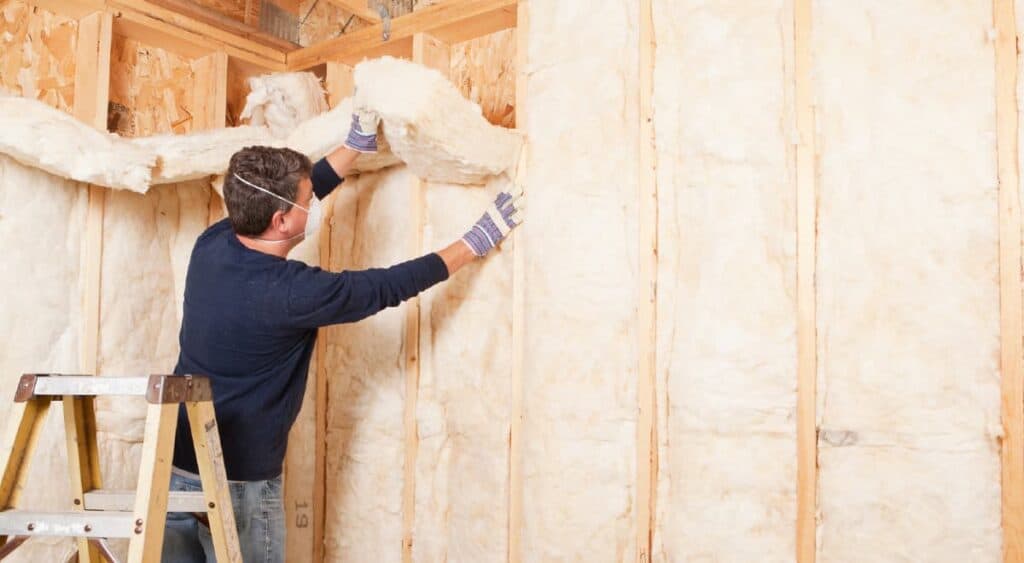
Now it’s time to install your insulation! If you’re using fiberglass batts, carefully place them between the wall studs, ensuring they fit snugly against the lumber.
As you place your fiberglass, you’ll have to work around some other features in your walls:
- Cables: Split the insulation batt so that it goes around the cable and insulates both sides.
- Electrical boxes: Trim the insulation with a utility knife to fit tight around the box.
- Pipes: Install insulation behind existing pipes so they’re exposed to the interior heat.
If you’re using rigid foam boards, attach them to the exterior of the framing and seal the seams tightly.
If you’re installing a vapor barrier, remember to place it on the appropriate side of the insulation, depending on your climate.
Step 4: Fill in and Seal Gaps and Cracks
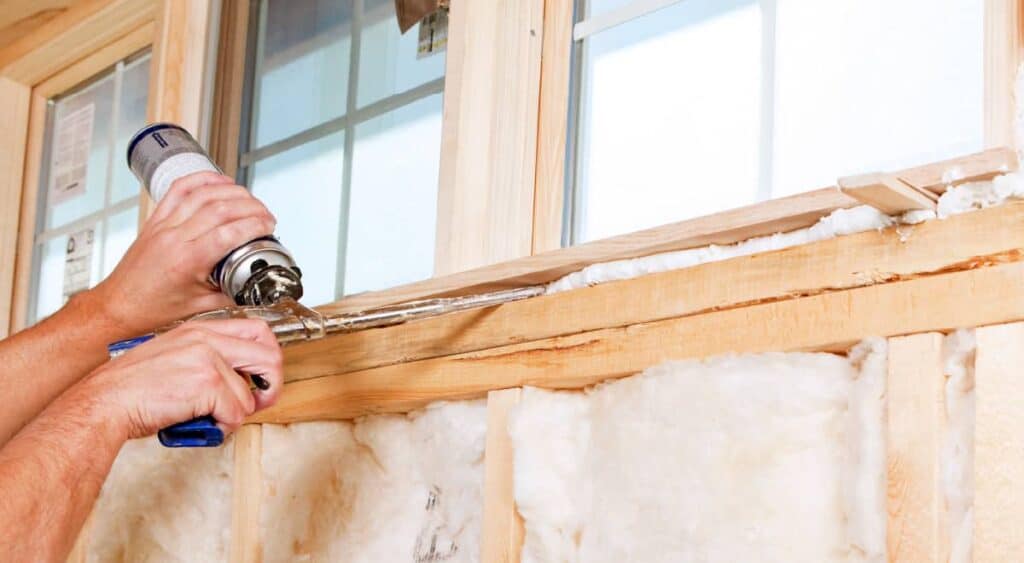
Before insulating other parts of your garage, seal gaps or cracks around your newly insulated walls.
Here are a few areas to pay special attention to:
- Around windows and doors.
- Where walls meet the ceiling.
- Around electrical outlets and pipes.
To seal these gaps, you can use expanding foam insulation or caulk.
Step 5: Finish your Garage Walls
Once your insulation and vapor barrier are in place, it’s time to finish your walls. If you’re using fiberglass batts, you’ll need to cover them with drywall or another wall covering. This will help protect the insulation and give your garage a finished look.
If you’re not interested in drywall, you can install a poly membrane sheet over the insulation instead. Some building codes may even permit exposed insulation, but know that fiberglass can irritate your eyes, lungs, and skin if you interact with it.
How to Insulate a Garage Ceiling
Your garage ceiling is a major source of heat loss in the winter and heat gain in the summer.
Insulating your garage ceiling is similar to insulating the walls, but there are a few key differences. You’ll need to use insulation with a higher R-value in your ceiling than in your walls.
The steps for insulating the ceiling are pretty much the same:
- Clear the area and remove any existing ceiling panels.
- Inspect and seal.
- Install insulation (include reflective insulation to block out radiant heat).
- Install a vapor barrier on the appropriate side of the insulation.
- Replace your ceiling panels or drywall to complete the job.
How to Insulate a Garage Door
Your garage door is a big, gaping hole in your garage’s insulation envelope. If you’ve gone to the trouble of insulating your walls and ceiling, don’t let all that hard work go to waste by neglecting your garage door.
The best type of insulation for garage doors is usually rigid foam insulation panels. These panels are easy to cut to size and can be attached directly to the garage door panels. You can also find garage door insulation kits that come with everything you need.
Here are the basic steps for insulating your garage door:
- Measure and cut: Measure your garage door panels and cut the insulation panels to size.
- Attach the panels: Use adhesive or another method to attach the insulation panels to the garage door panels.
- Seal the edges: Seal the edges of the insulation panels with weatherstripping or another sealant to prevent air leaks.
Wrapping Up: A Cozy Garage Awaits
An uninsulated garage isn’t the end of the world. But if your garage has air conditioning, insulating it will make a huge difference in your energy bill.
Additionally, insulating your garage can help you:
- Block out noise.
- Protect your belongings from extreme temperatures.
So what are you waiting for? Now that you know how to insulate a garage, grab your tools and get started! Learn more garage tips and tricks on our blog.
Frequently Asked Questions
With so many insulation options, there’s more to consider than an R-value. Learn more about garage insulation best practices and costs below.
What’s the best way to insulate a garage?
Batt and blanket insulation is the best and most popular way to insulate a garage. It’s cost-effective, simple to install, and strong. Fiberglass batts are the most popular, but you can also purchase mineral wool. It’s more expensive but has a higher R-value.
Should I insulate the garage floor?
Most folks don’t insulate their garage floor, especially if it’s just a regular concrete slab. But if you plan on turning your garage into a living space or an office, give it some thought. It’ll make the floor warmer and more comfortable.
Should you insulate an unheated garage?
You bet! Insulating your garage, even if it’s not heated, has plenty of benefits. It’ll help keep the temperature more stable, protect your stuff from drastic temperature swings, and even make it quieter.
Heated garages see the greatest benefits since good insulation reduces energy costs. But you don’t need a temperature-controlled building to enjoy an insulated garage.
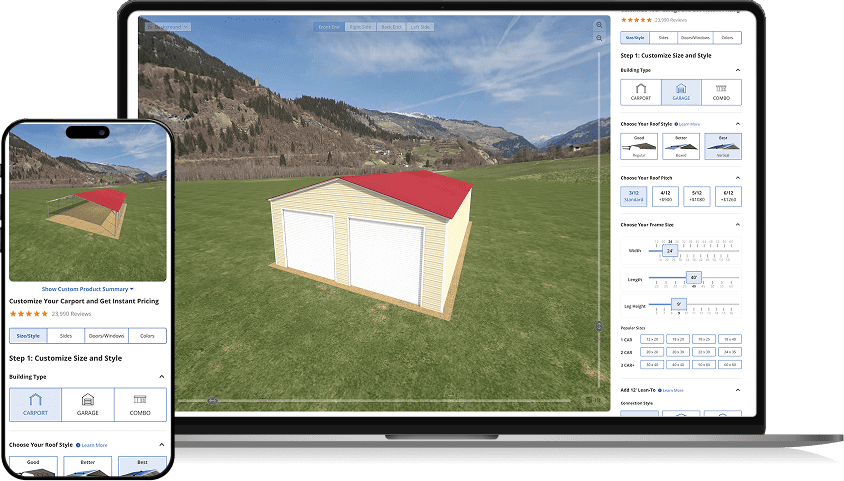
Design Your Perfect Garage
Your dream heated and insulated garage is waiting—all you have to do is design it. Explore custom metal garage designs you’ll love all year round with our online 3D garage builder.