Here’s how to clean out a garage or metal shed and organize it in record time. If you hate cleaning or prefer doing something else with your time, this guide is for you.
This guide has three parts:
- How to Clean Out Your Garage or Shed in Half a Day
- How to Get Your Garage or Shed Organized
- How to Clean the Outside of Your Garage or Shed
Part 1: How to Clean Out Your Garage or Shed in Half a Day
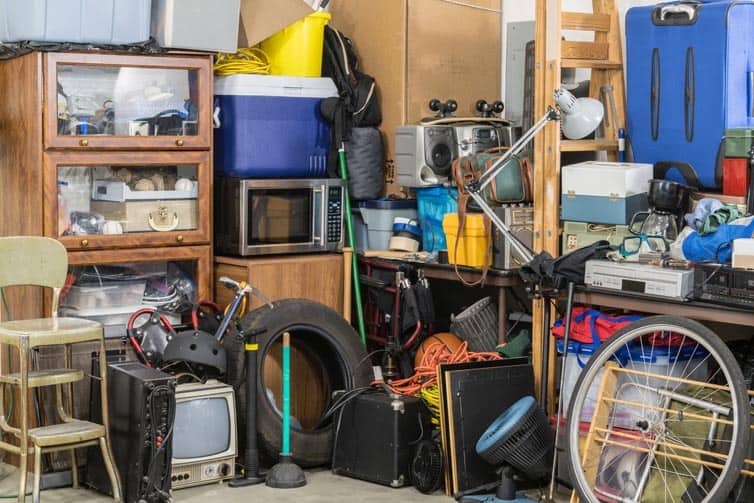
Do you have piles of stuff stacked up in your garage or shed? Dust and cobwebs everywhere? Here is how to get all that mess cleaned out in a few hours.
Before You Start: Mentally Prepare for Success
Many people make the mistake of organizing their garage before they get rid of the clutter. If your garage or shed is overflowing with stuff, the simplest way to create free space is to get rid of stuff that you don’t need.
If you’re like most people, you probably hang on to a lot more than you really need. One key to getting your garage or shed clean is teaching yourself some simple tricks for mentally letting go of stuff that you don’t need so that you can get rid of it.
Trick 1: Think about the “cost” of keeping your stuff. Everything you own has a “cost of ownership” that includes the time necessary to take care of it and store it. One big reason you need to clean your garage or shed right now is because of all that stuff you own. Wouldn’t you rather be spending your time doing something else? If you do a good job of getting rid of your extra stuff today, then you won’t have to pay the “price” of organizing it or cleaning it up again in the future.
Trick 2: Imagine you are moving across the country. What would you take with you? If you wouldn’t take an item with you on a long-distance move, then you probably don’t need to keep it.
Trick 3: Imagine your house or shed just burned down. What is in your garage or shed that is important enough that you would buy it again after a fire? Everything else can go.
Trick 4: Imagine you are cleaning the garage for your future self. Imagine twenty years from now, when you will be much older and may have moved a time or two. Do your future self a favor and get rid of anything he or she won’t need and wouldn’t want to move.
After you have chosen one of the mental tricks above, you’re ready to start cleaning.
Hour 1: Clear Floor and Counter Space and Sort into Piles
If it is a sunny day, open your garage or shed door and start hauling out anything that is lying in the middle of the floor and stuff in piles on tables and countertops.
As you clear out the space, sort items into categories like this:
Category 1: Must keep. These are the items that you use regularly and would definitely buy again if your garage burnt down.
Category 2: Throw away. Put all the garbage, broken and obsolete items, leftover scraps and empty containers, old magazines, and other disposable or recyclable items in the pile.
Category 3: Give away or sell. Here you can put items of value that are in good condition, but that you haven’t used in more than a year and are unlikely to use next year. This may include tools you don’t actually use, stuff for hobbies you don’t have time for anymore, books you aren’t going to read in the next year, or extra furniture.
Category 4: Probation. These are items you don’t really need, but you also aren’t mentally prepared to let go of yet. For example, perhaps you have a treadmill you haven’t used in years, but as you start cleaning, you decide you are going to start using it next week. Are you really going to use it? Probably not. So put it on probation: If it doesn’t earn the right to stay in your garage by getting used every month, it will lose its permission to stay in your garage.
Other items you should put in the probation pile are small gifts, mementos, and keepsakes that you aren’t ready to get rid of. Even though you don’t need these items, it could take a lot of time and mental effort to sort through and “let go” of them now. So just put them in the probation pile to deal with later.
Your goal in this first hour is to quickly clear out your garage or shed and identify 80% of the clutter that you can get rid of easily. You can sort through and take care of the remaining 20% of extra clutter after your garage or shed is mostly clean, on a day when you have more time.
Hour 2: Clean the Inside of Your Garage or Shed
Now that you have your garage or shed cleared out and flat surfaces cleared off, you can start cleaning out the dust, dirt, and cobwebs that tend to appear in most sheds and garages.
Here is how you can clean your garage out quickly:
- Use a broom to sweep cobwebs out of corners, sweep off counters, and sweep out the floor.
- Use a vacuum with a hose to vacuum up the places that the broom couldn’t clean well
- If you have any mold problems, try wiping it with a little bleach or vinegar mixed with warm water.
- Scrub any areas you need extra clean
- Mop or hose out the garage if you want
If there is extra moisture in your garage or metal shed for sale after cleaning, you might want to use a fan to help it dry out faster.
Hour 3: Put Away Your “Must Keep” Pile
The items in your “must keep” pile are the things that truly belong in your garage or shed. So find an appropriate place or zone where each item should always be kept, and put each item in its place. I’ll share long-term organizing tips in the next part of this blog, but for now, you just want to make sure your “must keep” items are put away in logical places in less than an hour.
Hour 4: Box Up and Shelve Your Probation Pile
Now you need to take care of your probation pile, which has all of the stuff you don’t need, but aren’t ready to part with. If you have some extra boxes, you can quickly sort items into categories, and put a label and “expiration date” on the outside of each box. For example:
- Canning supplies, use by December 2025
- Rarely used tools, use by August 2027
- Old baby clothes, use by …
As you do this, you may realize that you will never use those old baby clothes and you can move them over to the donate pile.
If you have shelves or an old bookcase, you can put your boxes there, or stack them somewhere else that is out of the way.
If you use anything from a box before the expiration date, you can move that item to a “normal” storage area, or can extend the expiration date on the box. The next time you clean your garage or shed, you can pull out any boxes that have expired and donate or discard them.
Hour 5: Throw Away and Donate Everything Else
In the last hour, you just need to get rid of every else that you didn’t put back in your garage or shed.
If you have time and energy for a garage sale soon, you can pack up your items to sell. Otherwise, use extra boxes or large garbage items to pack up anything in good condition and take it to a donation center as soon as possible. Everything else can go a recycle bin or garbage can. If you have extra-large items, you can call a thrift store or junk removal service to pick it up.
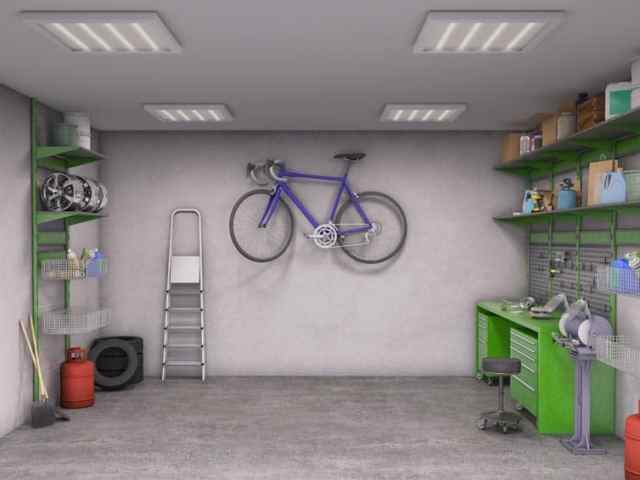
Part 2: Organizing Your Garage or Shed
In this part of the guide you will learn simple organizing techniques that can open up space in your garage or shed and allow you to find what you need when you need it.
The key to organizing your garage or shed is identifying a specific place for each item or type of item, and being sure to put everything back in its place when you are done with it.
Divide Your Garage or Shed into Zones
Designate one corner of your garage for sports equipment, another area for tools, another area for trash and recycling, etc. Dividing your garage into zones makes it easy to organize and find specific types of items.
As you identify your zones, consider using overhead storage. Many garages have a platform that hangs from the ceiling or even a loft area. The area near the ceiling of your garage or shed is an excellent place to store items that you only use once a year, like holiday decorations. Just be careful to make sure you don’t overload the platform or create a safety hazard.
Since most of your storage zone will be near a wall, you can also take advantage of your wall space to free up space on the floor.
Use Hooks
Instead of cluttering the floor or leaning tools against the wall (which can create tripping hazards and falling tools) clean up your space by hanging your shovels, rakes, hoes, leaf blower, and other garden tools off the ground. Visit your local hardware store and invest in some simple hooks made for hanging tools on the wall. There are even hooks designed to support the weight of a wheelbarrow! It’s much easier to sweep the dirt and cobwebs off the floor of your garage or shed when you don’t have to move brooms and rakes that are propped in a corner.
There are also special hooks and wall-mounted bike racks that you can use to get bikes off the floor, freeing up a lot of floor space.
Buckets can also take up a lot of space on the floor of your garage or shed. You may want to hang your buckets on wall hooks too. From there, use them for storing garden gloves, old rags, or gardening aprons. If you need to use the bucket, simply put its contents aside until your task is done.
Install a Pegboard
A pegboard is a must-have if you like to keep smaller tools in your garage or shed. Just hang containers of nails, screws, washers, and other small items on hooks stuck into the pegboard. Also, a pegboard is an ideal place to keep hammers, wrenches, pliers, and screwdrivers. By storing them on a pegboard, these tools are out of the way and easy to find when you need them. If you don’t want to put up a pegboard, you can design a tool wall that offers a place for all of your small tools.
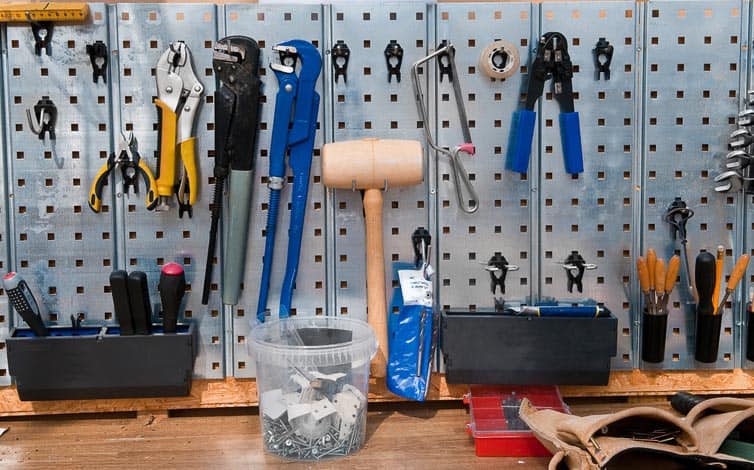
Pegboards can be readjusted, rearranged or reorganized to meet changing needs. By using a pegboard, you can keep frequently used tools readily available. Add hooks to make it easy to get at the tools you constantly use. The benefits of being organized make your work in the garden or garage enjoyable.
Store your garden hose in the winter by hanging it on the pegboard. As the season changes, so do your tool needs. You can keep seasonal tools where you need them when you use this multi-functional system for organization in your garage or shed.
Add Shelving or Bookshelves
Shelving allows you to store boxes and items in a way that they are and floor clutter. If you’re on a budget, you can buy a second-hand bookshelf for your garage. Otherwise, consider investing in “smart shelves” that can be adjusted. Adjustable shelving allows you to change your storage needs to accommodate new tools or items in your garage or in your outside storage shed.
Use Clear Plastic Bins for Small Items
Screws and nails that are stored in a haphazard way in a garage can drop on the floor and could even cause a flat tire. Clear plastic bins are excellent for storing small items like these because you can easily see what is inside each bin. You can place these bins on your shelving solution for easy access.
Use Labeled Boxes for Larger Items
Basic opaque storage boxes are useful for storing swimming pool toys, small pieces of sports equipment, and other items in an organized way, but they’re a pain to rummage through when you don’t remember what’s in them. So put a label on each box before you put it on the shelf.
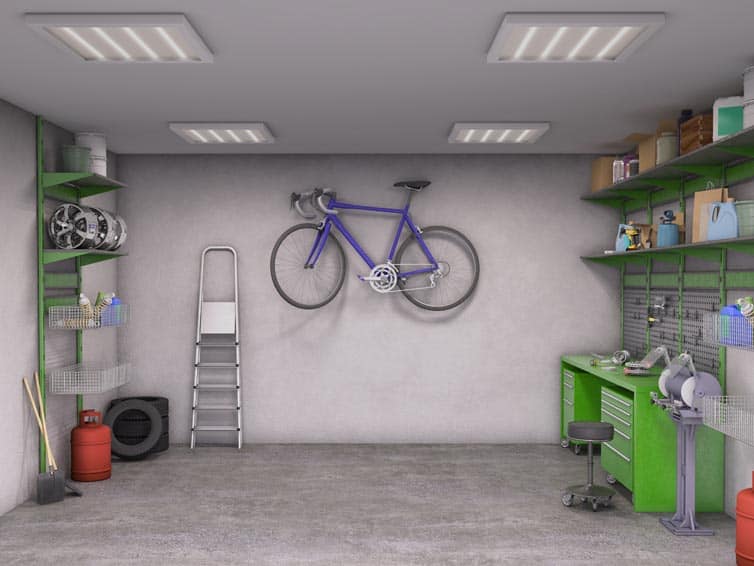
Once you have all of the small and medium-sized items up off the floor, you should only have a few things left on the floor. After everything is organized, you might discover you even have enough space to park in your garage!
Part 3: Cleaning the Outside of Your Garage or Shed
Regardless of whether the siding on your garage or shed is steel, wood, or vinyl, it’s important to keep it clean. By cleaning your siding on a regular basis, you can prevent the growth of mildew and clean away stains before they become a permanent part of your garage or shed. With a few simple tools, you can keep your siding in great shape!
Step 1: Clear the Area Around Your Garage or Shed
Sometimes the items stacked around your garage or shed can lead to wall damage. For instance, a pile of logs stacked next to a shed can attract termites, carpenter ants, and other insects that can burrow into the walls of your shed. Plus, mice and other rodents can make a home in a log pile and invade your shed. Rodents can chew on the walls as well as destroy items inside your shed. Leave a foot or so between your garage or shed and any items around it.
Step 2: Rise with Water
The next step is to rinse all the excess dirt and dust from the walls. A high-pressure hose is excellent for removing dirt and grime that has been there for a while.
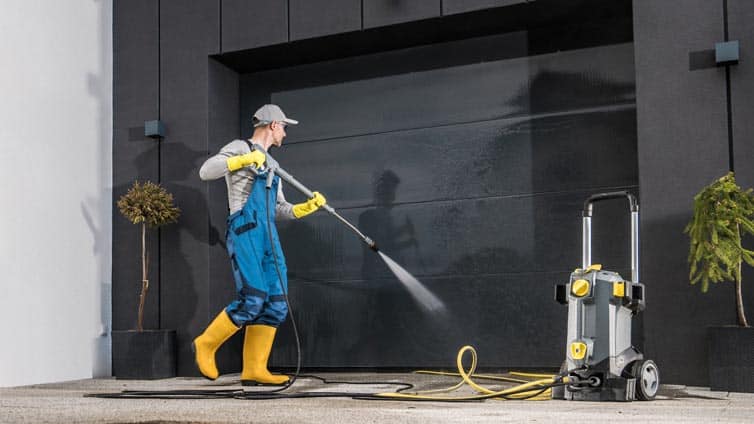
A power washer is more effective at loosening and removing dirt from the exterior of a building than the average garden hose. You can rent or even buy a power washer depending on how often you plan to use it. Many power washers come with attachments such as a cleaning wand and various types of soft-bristle rotating brushes to help you thoroughly clean your siding. A power washer can be used on wood, steel, and vinyl siding. Make sure to use a low-pressure setting when power-washing your wood or vinyl siding: This prevents the spray from damaging the surface of the siding.
There are cleaning solutions available to mix with water so the power washer is will get rid of stains as it’s knocking dirt off of the siding. If you want to make your own, you can mix 1/3 cup of laundry detergent for every six gallons of water. Put this solution in your power washer and use it to clean your siding.
Step 3: Prepare Your Cleaner
Using a semi-natural cleaning solution helps you maintain the walls of your garage or shed while being environmentally friendly. When you wash away the cleaning solution, you don’t have to worry about it hurting the plants and animals living around your shed. Plus, it’s likely that you already have many of the simple ingredients used to create a natural cleaning solution for your shed. This helps you to avoid spending money on expensive pre-made cleaners.
For vinyl sheds, a mixture of water and vinegar is an effective option. Your mixture should consist of 70 percent water and 30 percent white vinegar. Mix it in a bucket and use a traditional mop or a sponge mop to clean the siding from the top down. Leave the mixture on the siding for about 30 minutes, then rinse it off. If your shed has a concrete foundation, be careful about using vinegar, since it can damage concrete.
The simplest formula that works for all kinds of siding is water and dish soap. First, get a bucket and fill it with water. Then add dish soap. Keep in mind that you need just a few tablespoons of mild dish soap for every five gallons of water.
Step 4: Start Scrubbing
Use a long-handled scrub brush to apply your soapy mixture to the siding of your garage or shed. It’s best to use a brush with soft bristles so you don’t leave any scratches behind. Move your scrub brush evenly over the wood so you don’t miss any spots. It may be necessary to scrub areas of stubborn mildew with a toothbrush. Check to see if there is any damaged wood or splinters. Also, take a moment to check the condition of your shed windows to see if they need your attention. This cleaning method is appropriate for wood, steel, and vinyl siding.
Step 5: Do a Final Rinse
After washing all the walls, thoroughly rinse them with plain water. I suggest you wash your shed in the morning on a sunny, warm day so it has plenty of time to dry before night falls.
Step 6: Eliminate Any Remaining Mildew
After rinsing with water, give the area a few hours to dry before examining your work. If you still have spots of mildew on the walls, there are sprays available at home improvement stores that are specially made to remove mildew from vinyl, wood, or steel. If you use a commercial mildew remover, wear rubber gloves and protective eyewear so you don’t get any of the solution on your skin or in your eyes.
If you want to protect a wood shed or metal garage for sale from mildew in the future, you can put a sealant on the wood. A sealant keeps water from getting into the wood and causing mold and mildew to form. Plus, a coat of sealant can protect the shed’s color from fading in the sun. Sealant can be applied with a paintbrush to all the walls of a shed.
Cleaning the walls of your garage or shed can help it last longer and look its best on your property. Just a couple of hours of work on your walls can give you a shed you can be proud of.